Creating a 3R redundant manipulator with MATLAB
In this post I will detail how you can quickly build and visualize a 3R planar robot using the MATLAB robotics system toolbox (RST). The tutorial is based on MATLAB’s own tutorial found here
A schematic of a 3R planar robot can be seen in the figure below.
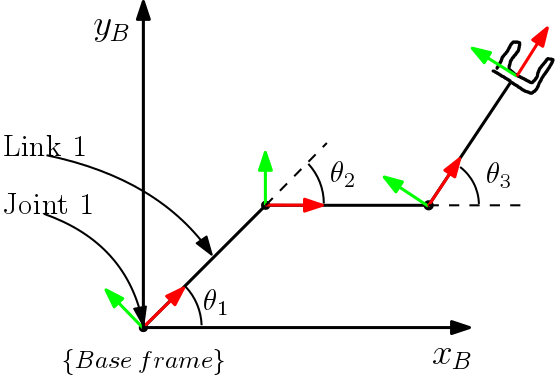
The robot we are going to build consists of 3 revolute joints. These are marked with a coordinate frame (x-axis: red, y-axis: green). Connecting the joints are 3 links.
RST let’s us define links and joints as rigidBody and rigidBodyJoint objects respectively. The robot itself as a RigidBodyTree object.
In the following code snippet we create a RigidBodyTree, and the first link and joint of the robot.
robot = rigidBodyTree;

link1 = rigidBody('link1');
joint1 = rigidBodyJoint('joint1', 'revolute');
joint1.setFixedTransform(eye(4));
link1.Joint = joint1;
The joint1.setFixedTransform(T) function specifies the transformation from the base frame to joint1. By using fixedTransform(eye(4)), we let joint1 coincide with the base frame.
Next let’s add link2 and link3. I’ll let the links have length 0.5m, and we’ll set the fixed transform to be along the x-axis from the previous joint.
link2 = rigidBody('link2');
joint2 = rigidBodyJoint('joint2','revolute');
joint2.setFixedTransform(transl(0.5,0,0));
link2.Joint = joint2;

link3 = rigidBody('link3');
joint3 = rigidBodyJoint('joint3','revolute');
joint3.setFixedTransform(transl(0.5,0,0));
link3.Joint = joint3;
transl(x,y,z) is a function from Peter Corke’s Robotics Toolbox. It creates a homogenous transformation matrix $T$ with zero rotation and translational components x,y,z.
RST provides a similar function called trvec2tform (translational vector to transform).
Finally we need an end effector link. The only difference here being, that this joint should be fixed:
ee_link = rigidBody('ee_link');
ee_joint = rigidBodyJoint('ee_joint', 'fixed');
ee_joint.setFixedTransform(transl(0.5,0,0));
ee_link.Joint = ee_joint;
Up until this point we have only created the joint and link objects. We attach them to the rigidBodyTree object by using the addBody method:
robot.addBody(link1, 'base');
robot.addBody(link2, 'link1');
robot.addBody(link3, 'link2');
robot.addBody(ee_link, 'link3');
The first argument is the rigid body object, and the second is the name of the body we wish to attach the link to. Finally let’s have a look at the robot:
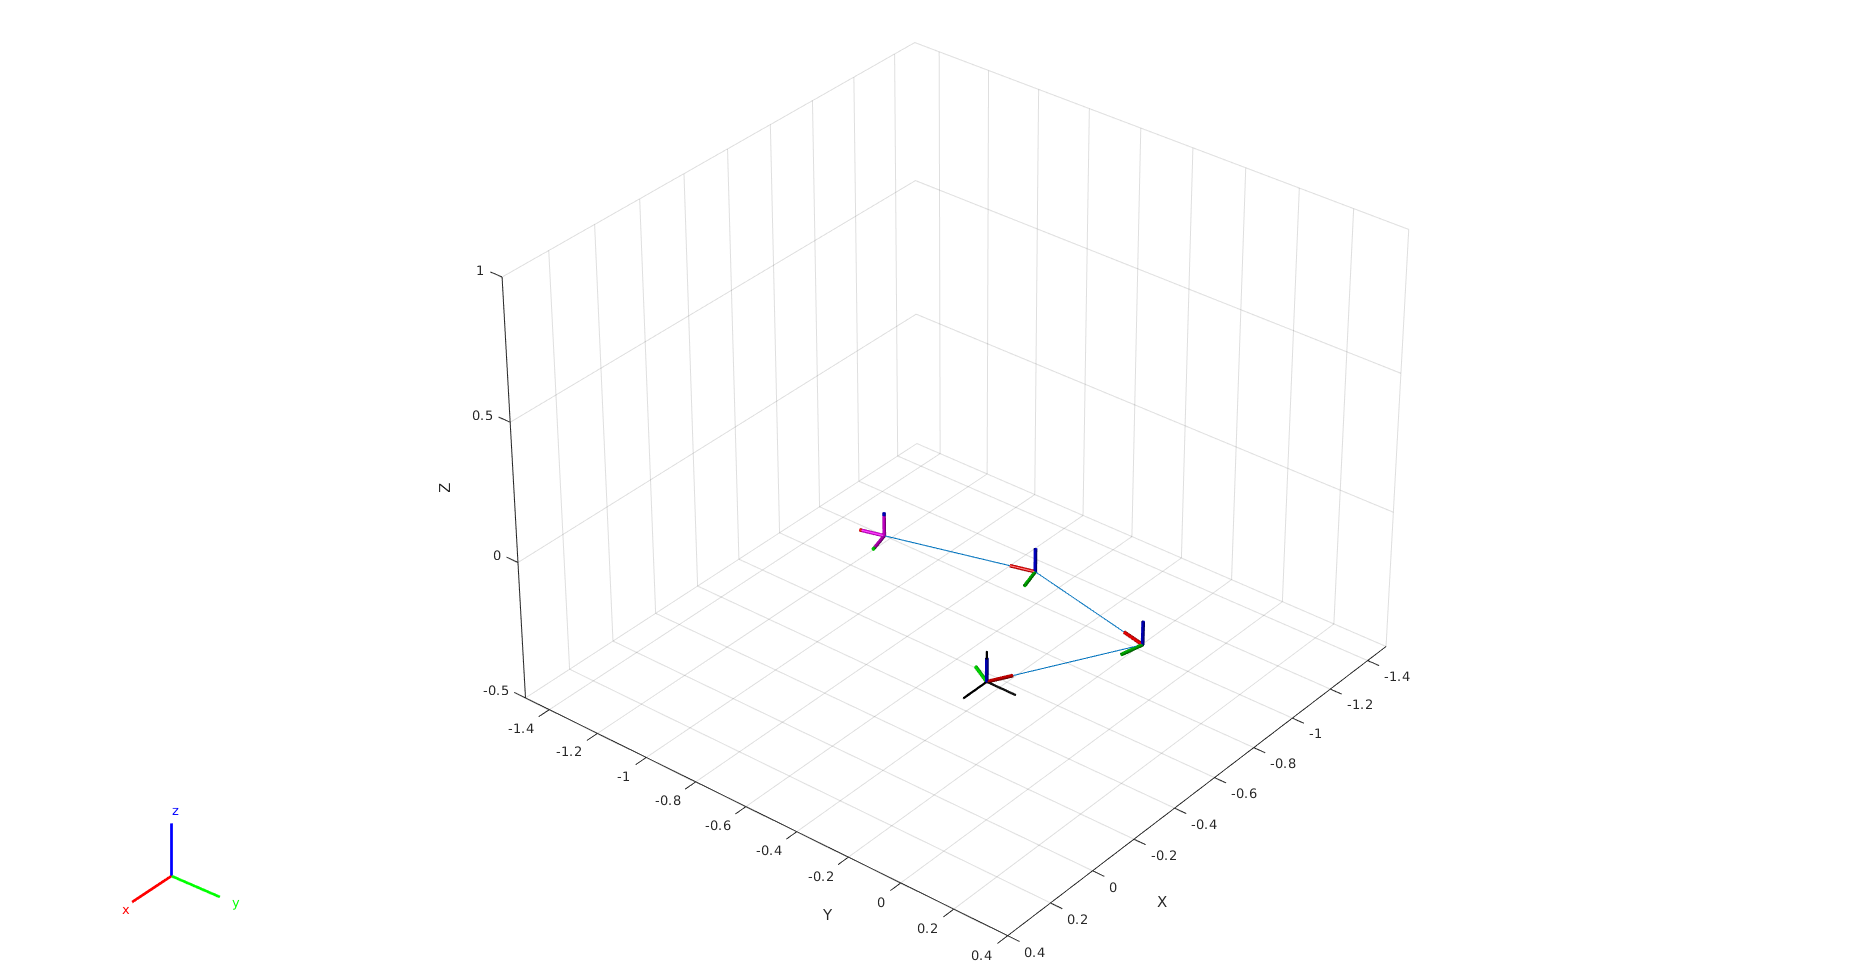
robot.show(robot.randomConfiguration)